Let me take you back 20 years. It was a time of chunky flip phones, MySpace top 8 drama, and...
Collect accurate Google Analytics data when working from home

Working-from-home (WFH) policies have allowed businesses to keep their operations going in an unprecedented situation. But one of the unintended consequences of a distributed workforce is that your website’s analytics run the risk of being skewed. Fortunately, there is an easy way to prevent this from occurring.
Why is my website reporting getting skewed?
Staff use websites differently to customers. The different behavioural patterns can increase or decrease key numbers, making it difficult to tell what’s going on with your target segments. Most businesses deal with this by filtering their office IP address out of their reports. In a traditional working environment, this works really well, as people rarely access the company website from home – but in the age of COVID-19 this is an extremely common practice for staff. The consequence of this is that your company will likely be over reporting on raw traffic numbers as well as conversion rates.
Why neither a VPN nor a plugin offers a complete solution
Using a corporate VPN
Historically, the most common solution to the staff problem has been to use Google’s built-in IP filters. These filters will only continue to work if every staff member uses the VPN for 100% of their connectivity. If they occasionally check the site from their mobile, this solution will miss that traffic.
Using the Google Analytics opt-out browser extension
You could ask your coworkers to download the Google Analytics Opt-Out extension, but this isn’t a great solution as it will affect more than just your corporate website. Additionally, it only works if you want to opt-out of Google Analytics, and won’t help you if you are using other tools (like Alexa, HotJar, etc) that you don’t want your internal traffic to appear on.
Fortunately, there is a solution which overcomes both of the above problems. It’s relatively quick to setup from the marketer’s side, and it only requires a single click for each of your staff to implement.
Use a cookie to ID your staff, and prevent your tracking scripts from firing
By embedding a staff-only cookie on a hidden page and asking your coworkers to visit this page, you can identify your internal traffic and filter it out of your reports. Here’s how it works:
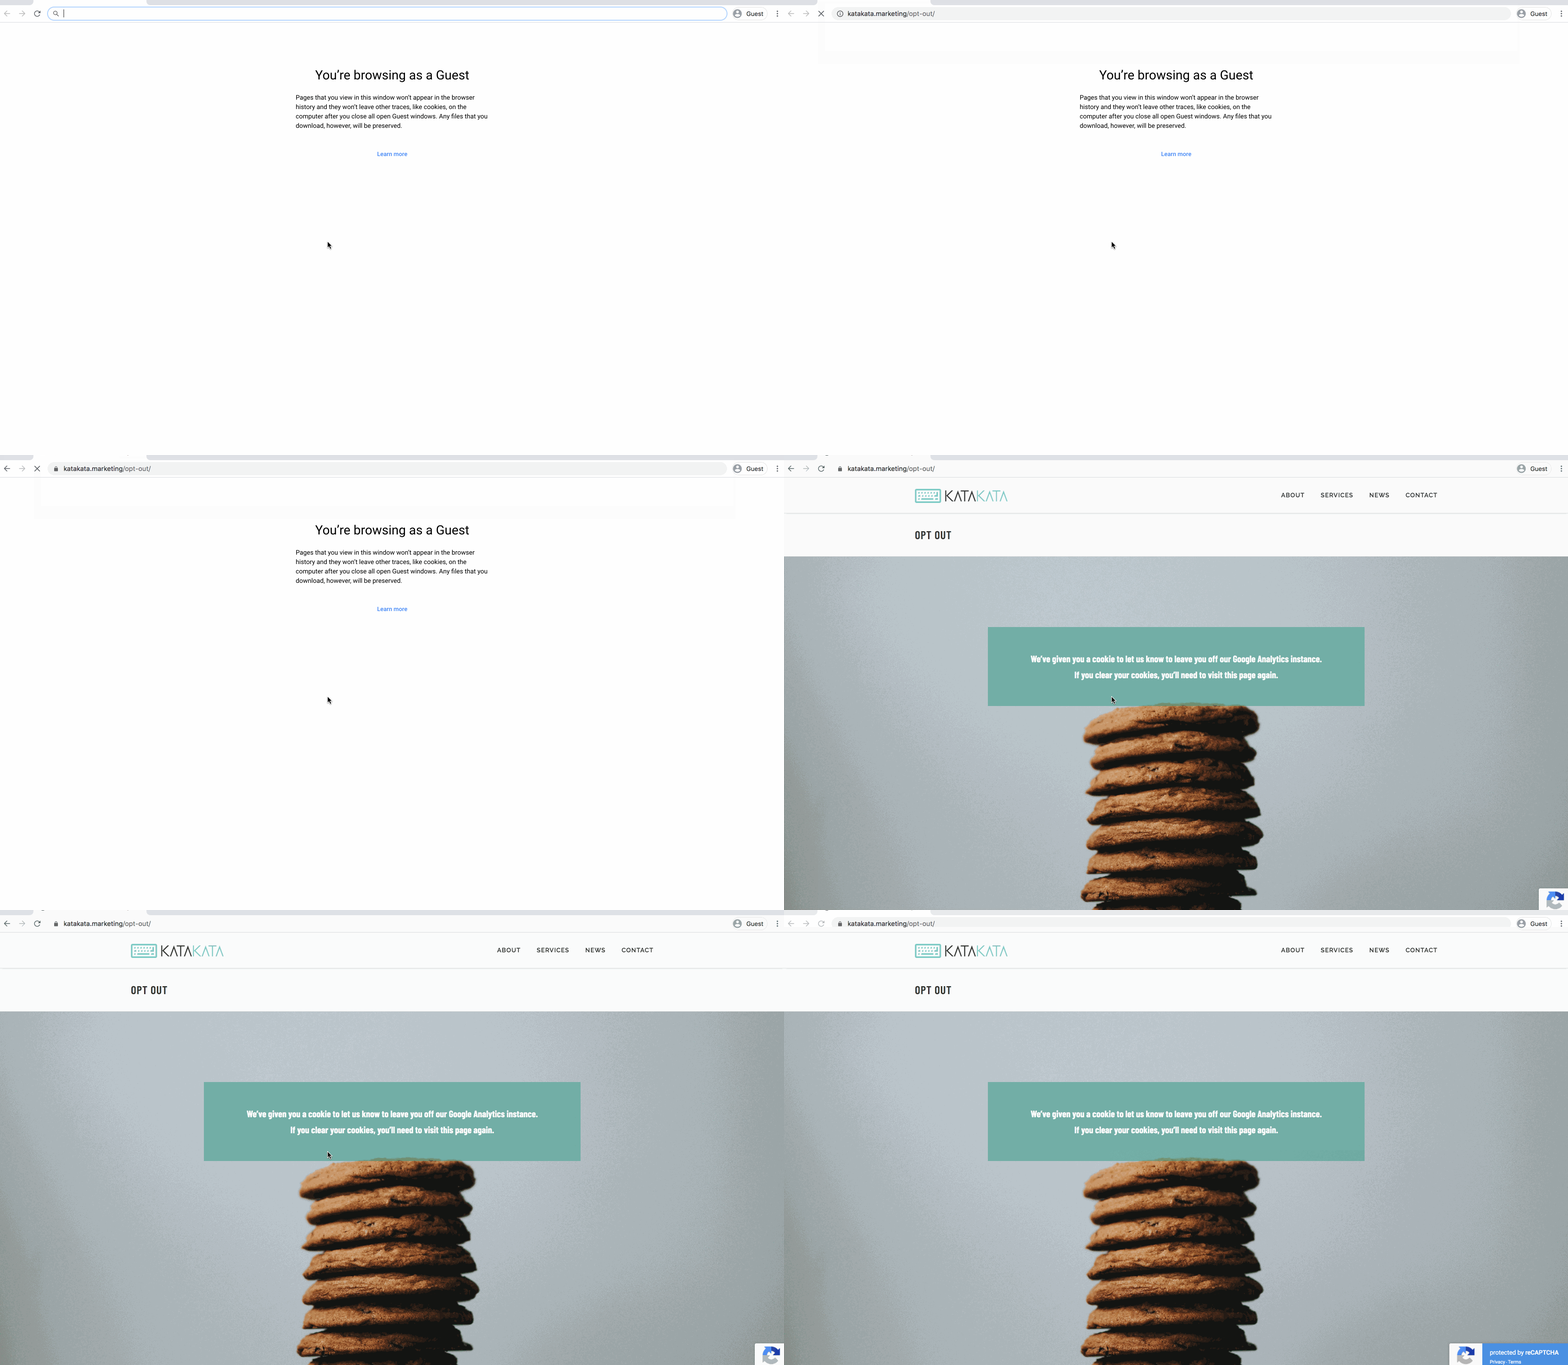
Step 1 – Create an opt-out page on your site.
It doesn’t need to be very fancy – just throw together something for your staff to see. You could even use an existing internal page if you have one. If not, pick a URL that people are unlikely to stumble upon and make sure you don’t link to it from any of your website’s menus or your sitemap.
For extra points you can restrict it from appearing in search engines using your robots.txt file, or a CMS plugin. This will prevent the unlikely scenario that customers accidentally find your secret page on Google or Bing.

Step 2 – Insert your cookie generating code
<script>
function setCookie(cname, cvalue, exdays) {
  var d = new Date();
  d.setTime(d.getTime() + (exdays * 24 * 60 * 60 * 1000));
  var expires = "expires="+d.toUTCString();
  document.cookie = cname + "=" + cvalue + ";" + expires + ";path=/";
}
setCookie("katakatafreshlybaked", "nobaking", 3650);
</script>
If you aren’t a coder, don’t fret, we promise this above code block is as complicated as it will get.
There are three parts that make up our cookie. The cookie name, the cookie value, and the expiry date.
Let’s take a look at the second last line of the code.
The cookie name is defined where the code says “katakatafreshlybaked“. Before you place this code on your site you should replace this with your company name (or another appropriate cookie name).
The cookie value is defined where the code says “nobaking“. Before placing this code on your site you should set this to “staff” or “opt-out” or another appropriate name.
Finally, we have the time (in days) before the cookie will expire. In the example code, we’ve set ours to 10 years because we don’t want staff to have to constantly reactivate the cookie. If you’d like you can change it to a different value.
Once you have updated the cookie name and the cookie value, you can paste the code onto your newly created opt-out page.
Take a deep breath, the worst part is now over.
Step 3 – Log into your Google Tag Manager account.
If you don’t have a Google Tag Manager account set up already, it’s fairly straight-forward. You can follow Google’s instructions here, or fill in our contact form and one of our Google Tag Manager Certified marketing nerds can help you out.
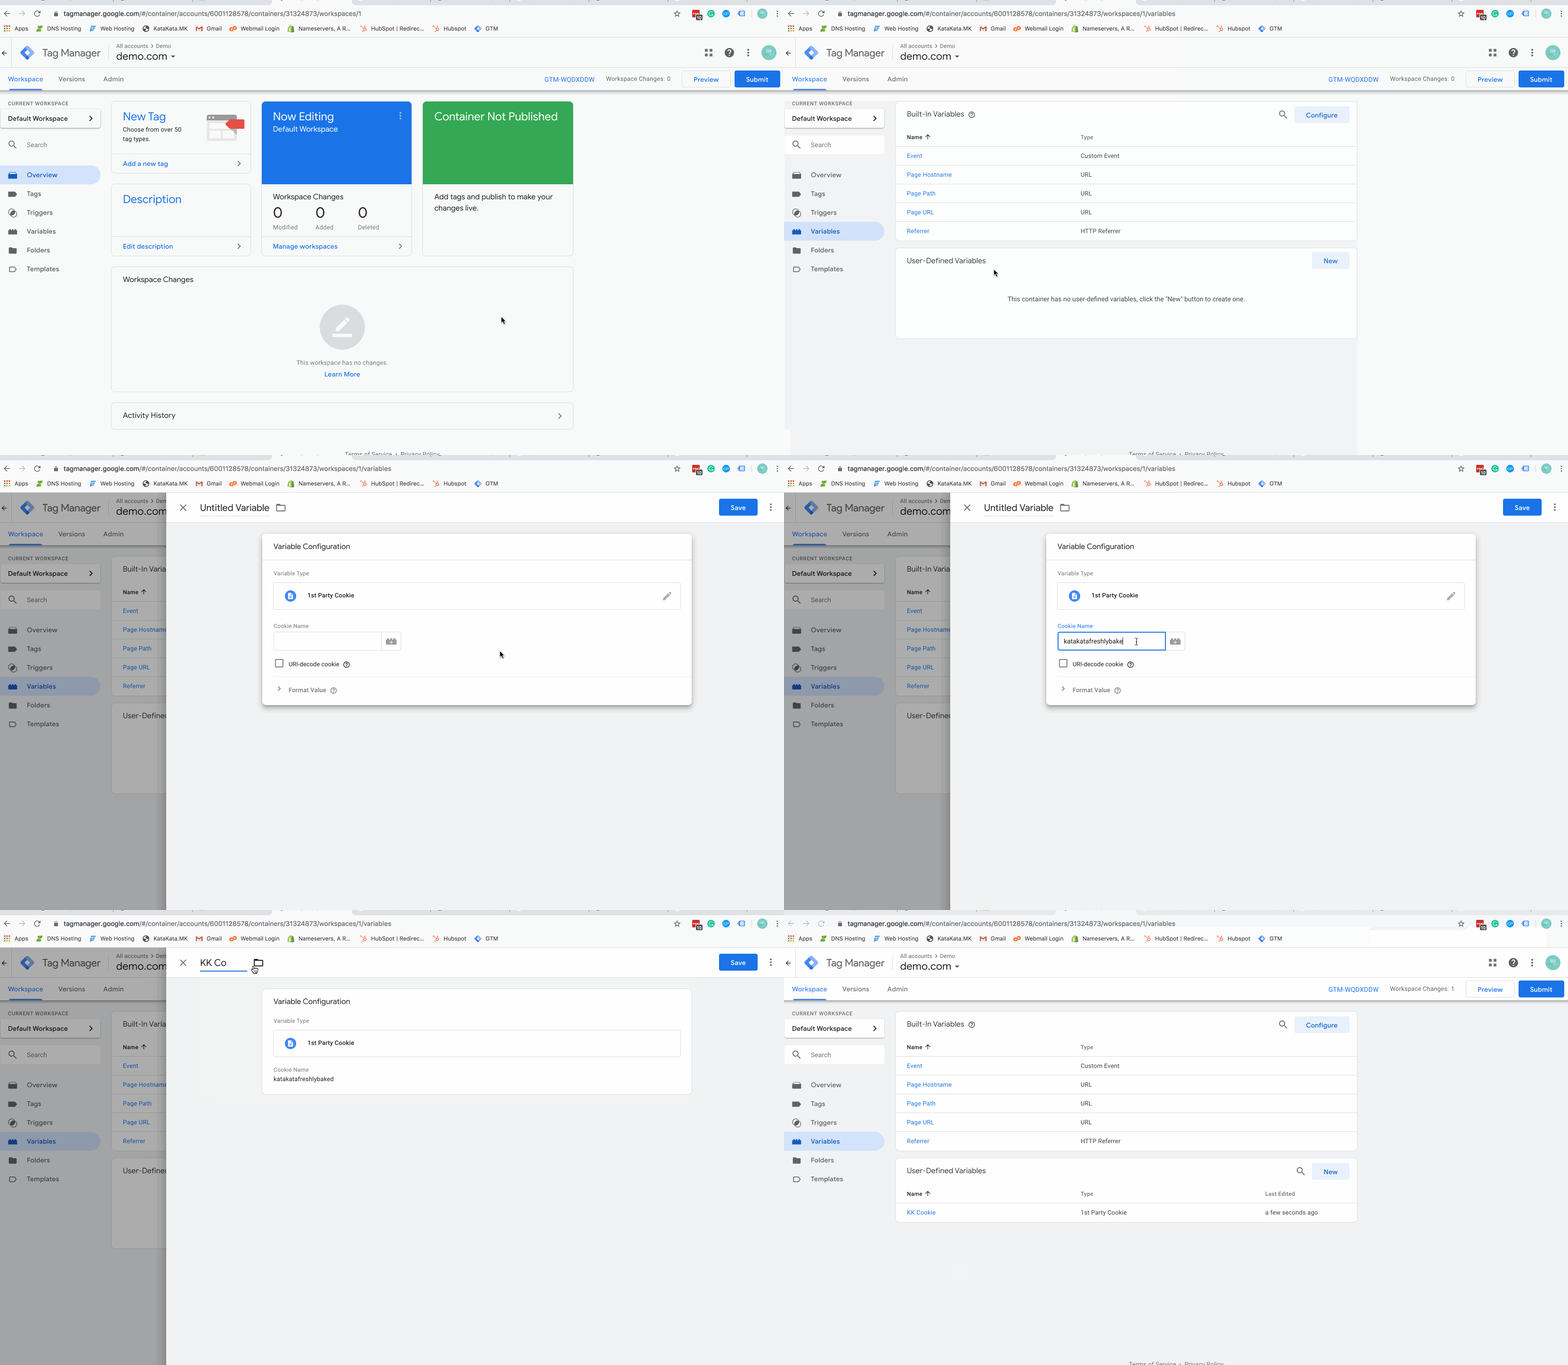
Step 4 – Create a Tag Manager variable for your new cookie

The above gif will show you how to create a Google Tag Manager (GTM) variable. Make sure you name your cookie with the same cookie name you used in the javascript code above.
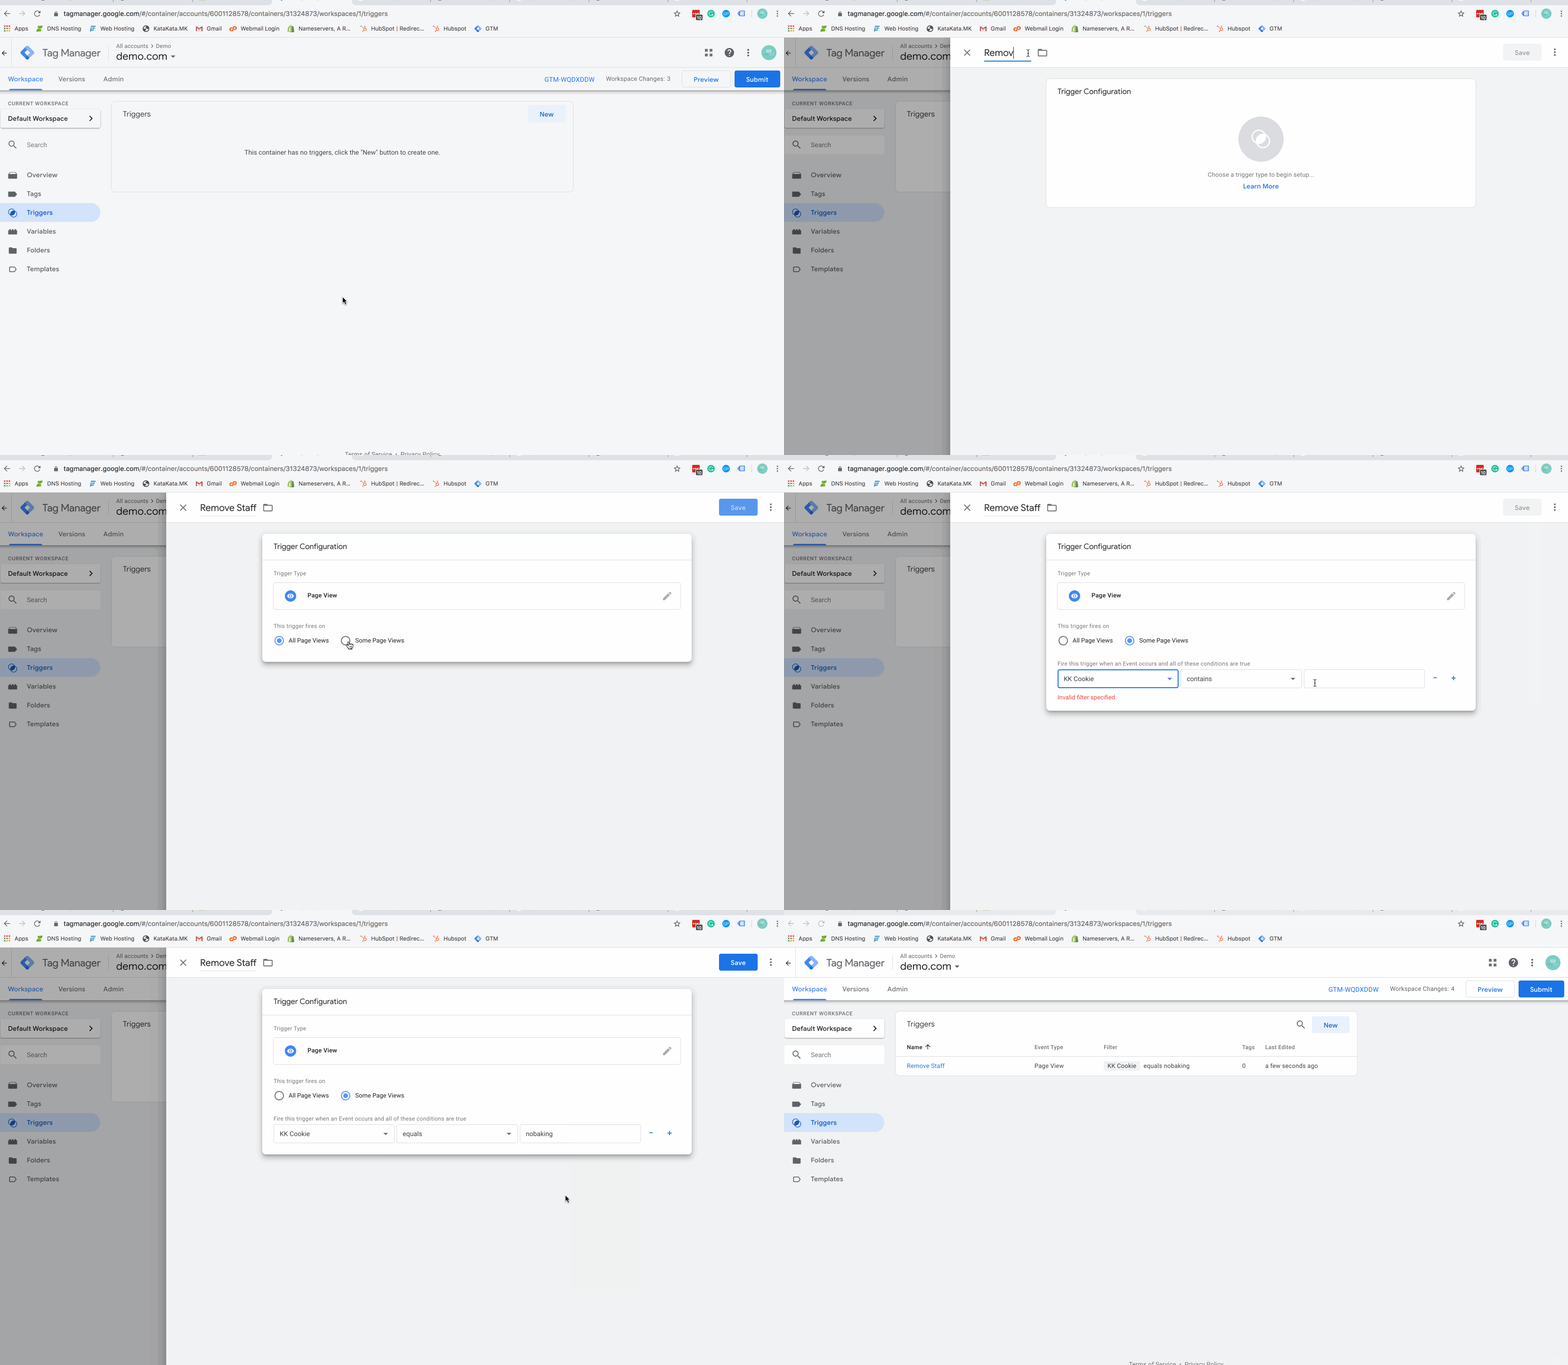
Step 5 – Create a firing trigger

The above gif will show you how to create a Google Tag Manager (GTM) firing trigger. Make sure you set the value of your trigger to equal the cookie value you used in the javascript code above.
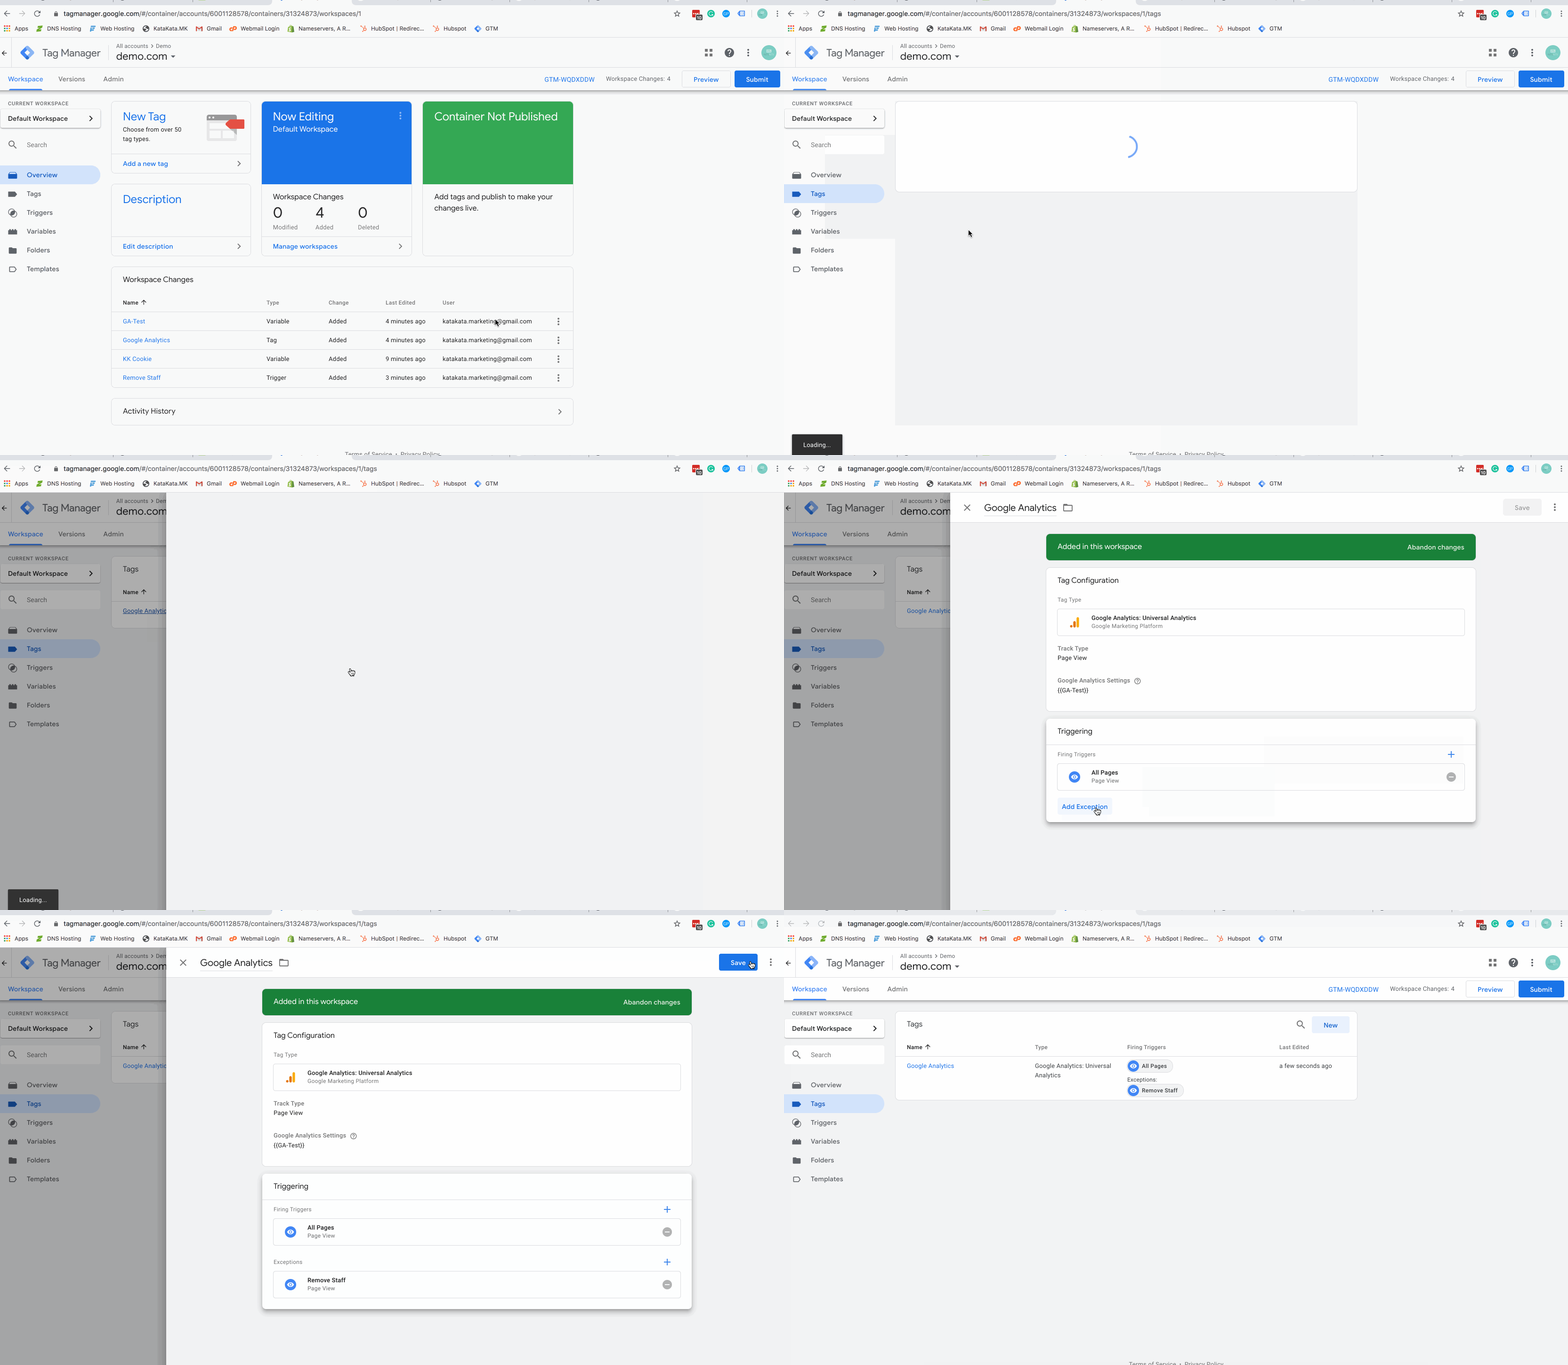
Step 6 – Add the trigger as an exception to Google Analytics Tag

The above gif will show you how to add your new firing trigger as an exception to your tags. You can do this just for your Google Analytics tag, or other tags as desired (for instance, if you are running remarketing advertising you may wish to opt staff out of Facebook or Linkedin tracking to keep a cleaner advertising audience).
Step 7 – Publish your container.
Hit the big blue publish button.
You can check that the tag is working by using Google Tag Manager’s built-in preview tool. It’s very helpful and intuitive.
Step 8 – Ask your staff to visit the opt-out page
The final step is to get the cookie deployed onto your co-worker’s devices. To accomplish this, all they have to do is visit the opt-out page you built. Best practice would be to email your staff a link, and ask them to click it on both their laptop and their mobile.
Well done – give yourself a pat on the back!
TL;DR – Set a first-party cookie to opt-out staff, then use Google Tag Manager to prevent your other tags from firing if the cookie is present. Code examples included below.

